.svg)


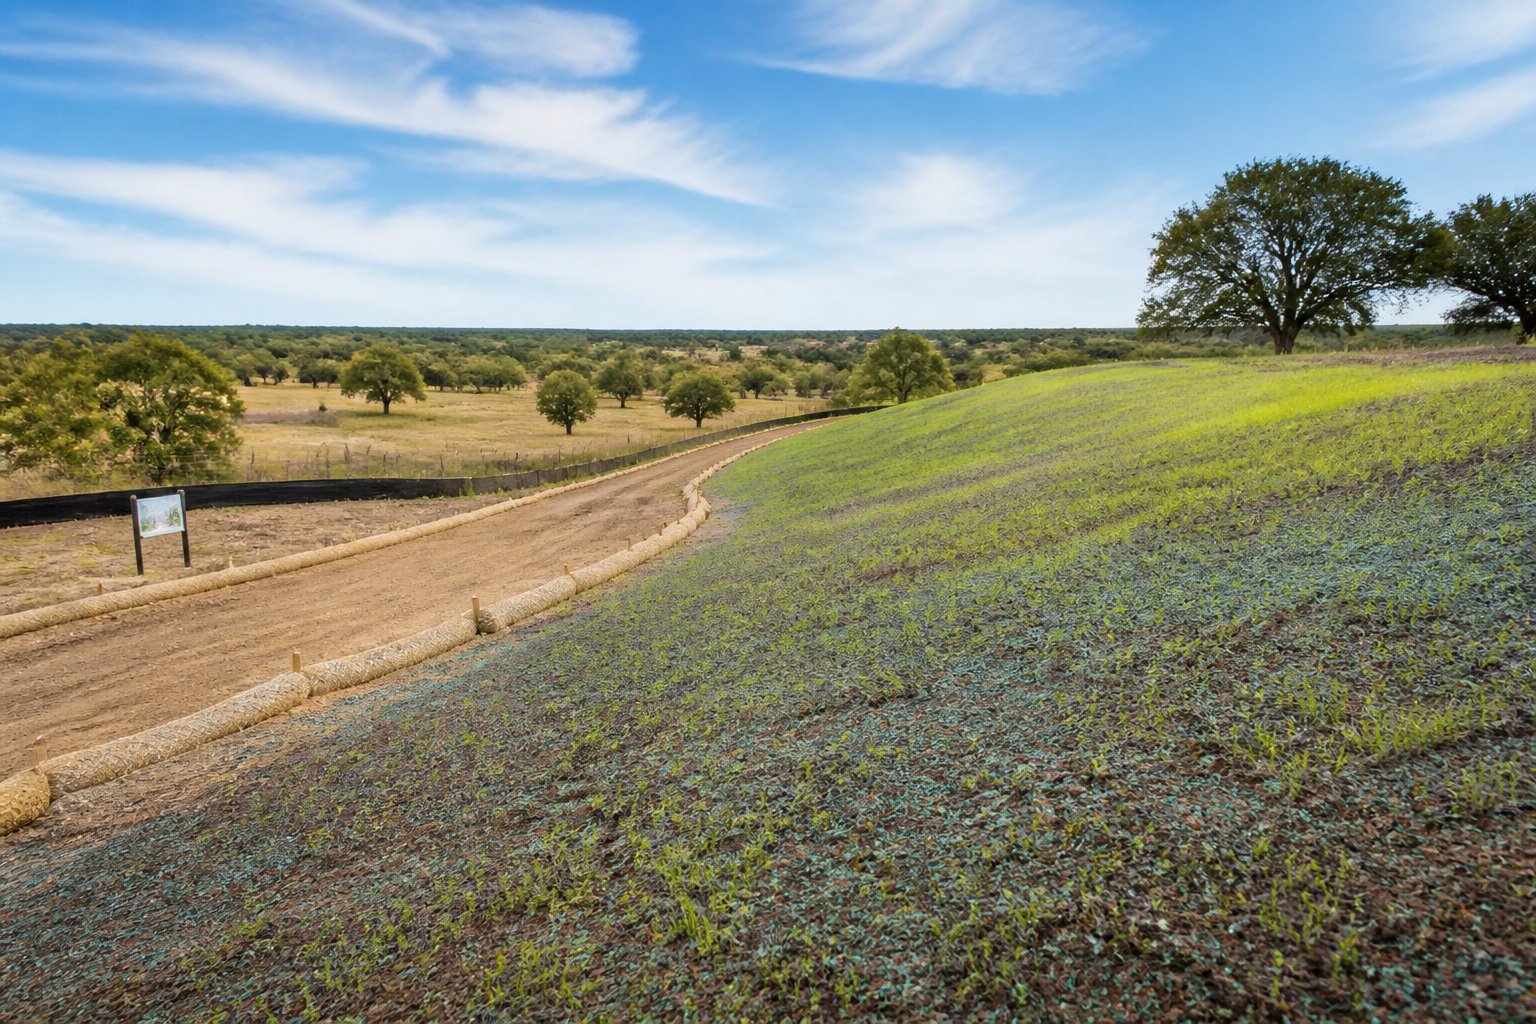
Visible sprout activity typically shows up 7 to 14 days after application. Turf establishment typically takes 4 to 6 weeks. Those two numbers drive the hydroseeding germination timeline in Texas, and they should drive your closeout schedule too. Bare soil on a graded pad is a clock running against your stormwater permit. Inspectors want to see coverage, not a work order.
Timelines shift with conditions. Soil temperature, clay content, rainfall, and irrigation access all pull those windows tighter or push them longer.
A pad seeded in late April behaves nothing like the same pad seeded in mid-August near Houston. Knowing which direction the site is moving lets you set realistic dates with your general contractor instead of guessing.
Keep reading to learn what happens at the soil level during each phase, how Texas site conditions change the window, and how native seeding benchmarks differ. By the end, you will be able to place seeding on your schedule with enough buffer to hit inspection without a re-application.
The Expected Timeline From Application to Establishment
Standard hydroseeding follows a predictable four-stage arc: activation, sprout, thickening, then mow readiness. Under normal conditions, the full hydroseeding growth timeline runs about four to six weeks from application to usable turf.
The slurry does the heavy lifting early. Hydraulic mulch holds moisture at the seed line, shields against splash erosion, and keeps the seedbed from crusting over in the sun. That protective layer is why hydromulch outperforms dry broadcast seed on graded construction pads.
Each stage below has a visible marker you can photograph for your file. Those markers matter when an inspector asks what progress looks like.
Days 1 Through 7: Moisture Retention and Seed Activation
Nothing appears above ground during the first week, and that is normal. Under the mulch layer, seeds are absorbing water and breaking dormancy while soil microbes and fertilizer begin working.
This is the most fragile stretch of the process. If the mulch dries out completely, activated seed can die before it ever pushes a shoot. Consistent surface moisture is the single biggest variable during days one through seven.
Wind and heat both accelerate drying. On open, exposed pads with no windbreak, the surface can go bone dry in a single afternoon. Watch for the mulch to stay dark and damp rather than pale and crusted, because color is the fastest field read you have.
Days 7 Through 14: Visible Sprout Activity
Fine green threads start showing through the mulch, usually first in low areas where moisture collects. This is the germination window most contractors are watching for, and it typically lands within 7 to 14 days.
Coverage will look uneven at this stage, and that is expected. Warm-season species and cool-season species in the same mix rarely germinate on the same day. You get a staggered flush rather than one uniform carpet.
Do not judge the application yet. Thin-looking spots at day 10 often fill in by day 20 as slower seeds catch up.
Foot traffic and equipment during this stage cause damage that shows up later, so keep the area flagged.
Weeks 3 Through 4: Root Development and Coverage Thickening
Growth shifts underground. Seedlings put energy into root mass, which is what actually holds soil and satisfies erosion control expectations. Above ground, you will see blades lengthen and density increase. The mulch layer begins breaking down and blending into the topsoil. This is a sign the application is doing its job.
By the end of week four, most sites show meaningful surface coverage on flat and moderately sloped ground. Steep cut slopes and shaded areas lag behind and may need a second look.
Weeks 4 Through 6: Establishment and First Mow Readiness
Turf reaches establishment and is generally ready for a first mow once blades hit roughly three inches. Cut no more than the top third to avoid stressing young plants. At this point, roots are anchored well enough to handle light traffic and normal rain events.
This is usually the milestone your closeout documentation is built around. Weather can compress this to four weeks or stretch it past six. Which direction it moves depends almost entirely on the conditions covered next.
Texas Conditions That Change the Germination Window
Soil temperature, heat, and clay behavior are the three Texas variables that move germination dates the most. None of them are guesswork; you can read them before you schedule.
Soil Temperature and Seasonal Grass Growth
Soil temperature drives germination more than air temperature. Warm-season grasses such as Bermudagrass need soil consistently above roughly 65 degrees before they move.
Cool-season grasses behave in reverse. Ryegrass and tall fescue germinate in cooler soil and are often used as a temporary cover crop when a site needs stabilization outside the warm-season window.
Here is how seasonal timing generally plays out across Texas:
- Spring (March to May): Best all-around window. Soil warming, rainfall present, germination often at the fast end of 7 to 14 days.
- Summer (June to August): Fastest germination when irrigation is available; highest failure risk without it.
- Fall (September to October): Strong for cool-season grass and native seeding. Good root time before winter.
- Winter (November to February): Seeds may sit dormant. Erosion control is still needed, so mulch and blankets carry the load.
Heat, Wind, Rainfall, and the Weather Forecast
Check the weather forecast before you set an application date, not after. A 100-degree stretch with steady wind can dry a seedbed faster than a crew can water it.
Heavy rainfall creates the opposite problem. A gully-washer within 24 hours of application can move seed downslope if the tackifier has not cured. This is common along the Gulf Coast during storm season.
Fine soil particles that wash off a site become sediment. Sediment leaving the property is what triggers findings. Timing around the forecast protects both the seed and the permit.
Clay Soils, Drainage, and Surface Moisture Loss
Expansive clay soils across the Houston metro, DFW area, and much of Central Texas complicate germination in two ways. Clay holds water at depth but crusts hard at the surface, and that crust blocks emerging shoots.
Clay also drains slowly. Water pools in low spots and runs off compacted high spots, so moisture ends up uneven across a single pad even under the same watering schedule.
Retaining a workable layer of topsoil during grading helps more than almost anything else. Sites that scrape down to raw subgrade clay routinely need extra water and extra time. That shows up in delayed closeout on retention pond slopes and drainage channels.
Soil behavior is set long before the truck arrives. This makes site prep the next thing to get right.
Site Preparation and Application Factors That Affect Growth
Preparation controls germination more than the slurry does. Poor seedbed preparation is a leading cause of seeding failure, including loose or dry surface material and heavy weed competition, as noted in seedbed preparation guidance from the Natural Resources Conservation Service.
Grading and Soil Preparation Before Application
Final grading should leave a firm but not compacted surface. Seed needs to sit against soil, not on top of a hardpan or buried under loose spoil.
Track-walking slopes perpendicular to the fall line creates small ridges that catch seed and slow runoff. That single step improves seed-to-soil contact on cut slopes measurably.
Clear rock, debris, and construction spoil before application. Slurry sprayed over rubble produces patchy coverage that fails inspection later.
Seed Mix Selection for Texas Construction Sites
Match grass species to region, season, and end use. A mix that performs on a Corpus Christi industrial pad may underperform on a shaded corridor in Central Texas.
Common choices on Texas construction sites include:
- Bermudagrass: Warm-season workhorse, heat and traffic tolerant, strong on open commercial pads.
- Buffalograss: Native warm-season, low water demand, well suited to drier and rural sites.
- Ryegrass: Fast temporary cover for cool-season stabilization while permanent seed waits.
- Tall fescue: Cool-season option for shaded or northern Texas locations.
State highway work adds another layer. TxDOT specifies district-level seed mixes based on urban or rural conditions. Its roadside vegetation guidance calls for deep-rooted material suited to roadway conditions.
How Mulch, Tackifier, and Soil Amendments Protect Seed
Fertilizer feeds early growth, soil conditioners improve structure, and tackifiers bond the mulch layer to the ground. Together, they keep the seed in place through the wind and the first rain.
Steeper ground needs more than standard hydraulic mulch. On demanding slopes, we specify Flexterra flexible growth medium. For high-risk grades, a bonded fiber matrix for slope stabilization holds where lighter products slide.
Getting the application down correctly is only half the job. The two weeks that follow decide the outcome.
Protecting the Application During Early Establishment
Water management during the first 14 days determines whether the timeline holds. Most failed applications trace back to moisture, not seed quality.
Building a Watering Schedule for the First Two Weeks
Light and frequent beats are heavy and occasional. The goal is to keep the mulch layer damp without creating runoff that carries seed downhill.
On most Texas sites, that means two to three short cycles per day during hot stretches, adjusted down after rain. Where irrigation is not available, water trucks or temporary risers should be planned into the schedule before the crew mobilizes.
TxDOT vegetative watering requirements on state projects follow a specified schedule, rate, and volume. Confirm the spec before assuming rainfall will cover it.
Adjusting Irrigation After Germination Begins
Once sprouts appear, shift toward deeper and less frequent watering. That change pushes roots down instead of keeping them at the surface.
Shallow-rooted turf looks fine at week three and fails during the first dry stretch. Deeper watering builds the root mass that erosion control performance depends on.
Watch low spots for standing water. Saturated soil in clay areas can rot seedlings just as fast as drought kills them.
When Touch-up Work and Erosion Controls May Be Needed
Some areas need a second pass, and planning for it beats reacting to it. Common triggers include washouts after heavy rain, equipment traffic, and shaded corners with slow germination.
Watch for these signs during weekly walks:
- Rills or channels cutting through the mulch layer
- Bare patches larger than a few square feet on slopes
- Sediment collecting at silt fence or inlet protection
- Mulch peeled or displaced along the top of a cut slope
Where vegetation cannot establish fast enough, erosion blankets or additional hydraulic stabilizers bridge the gap. Pairing seeding with erosion control services for Texas sites keeps sediment loss and stormwater compliance under control while the grass catches up.
Standard turf is one path. Sites with long-term restoration goals follow a different clock.
Comparing Standard Hydroseeding With Native Grass Seeding
Native grass seeding runs on a longer timeline: germination typically in 2 to 4 weeks, establishment in 2 to 3 months. Standard hydroseeding is faster to achieve visible coverage. Native seeding is stronger over the years.
Why Native Establishment Commonly Takes Two to Three Months
Native species invest in roots first. Above-ground growth looks thin for weeks while deep root systems develop. This is exactly what makes them durable later.
That slower start is a scheduling issue, not a quality issue. Sites judged at week four often look sparse even when establishment is on track.
Seed dormancy also plays a role. Some native seeds germinate in waves across a season rather than all at once.
Selecting the Right Method for Long-Term Site Stabilization
The method should follow site conditions and access. Hydraulic application covers irregular terrain and slopes where equipment cannot travel safely.
Drill seeding places seed at consistent depth and spacing, with germination typically in 1 to 3 weeks under proper conditions. On large open acreage, drill seeding for large acreage restoration delivers strong seed-to-soil contact with minimal surface disturbance.
Environmental reclamation seeding usually combines methods. Native mixes go down where long-term stabilization matters. Faster cover species handle short-term erosion control.
Aligning Vegetation Milestones With Project Closeout
Back-plan from your inspection date. If a permit requires established vegetation, count backward six weeks for standard turf and up to three months for native grass.
Season matters as much as duration. A native mix seeded in September has a very different trajectory than the same mix seeded in June.
For long-term corridors and reclaimed tracts, native grass seeding for Texas restoration gives durable coverage once the establishment period is respected.
With benchmarks set, the remaining decision is where seeding lands on the construction schedule.
Plan the Seeding Window Around Your Project Schedule
Seeding should be scheduled like any other trade, with a date, a duration, and a dependency. Treating it as a punch-list item is how sites end up seeding in July and re-seeding in August.
Coordinate final grading, utility work, and traffic control so the pad is truly ready. Re-mobilizing because a subcontractor trenched through a fresh application costs more than waiting three days.
Use this quick sequencing check before locking the date:
- Grading complete and topsoil respread where specified
- Water source confirmed for the first two weeks
- Seed mix matched to season and any TxDOT or agency spec
- Inspection or permit milestone date identified and back-planned
- Erosion control measures in place for the establishment period
Rough cost planning helps too. A review of hydroseeding cost per acre in Texas shows how slope, access, and seed spec change the number before you commit to the scope.
Common questions come up once the date is set. The answers below cover the ones we hear most.
Frequently Asked Questions
How long does hydroseed take to germinate in Texas?
Germination typically begins within 7 to 14 days under normal conditions. Full turf establishment usually takes 4 to 6 weeks, depending on soil temperature, moisture, and seed mix.
What factors affect hydroseed germination time on Texas construction sites?
Soil temperature, watering consistency, clay content, slope, and seed selection have the biggest effect. Compacted subgrade and no irrigation access are the two conditions that most often extend the window.
How soon should grass seedlings appear after hydroseeding?
Expect the first fine green threads around day 7 to day 10 in warm soil. Sometimes it is closer to day 14 in cooler conditions. Coverage looks uneven at first because different species germinate at different rates.
Does hydroseed germinate faster in spring or fall in Texas?
Spring generally produces the fastest germination for warm-season grasses because the soil is warming and rainfall is more reliable. Fall works well for cool-season grass and native mixes that benefit from root development before winter.
How does Texas summer heat affect hydroseed germination?
Heat can speed germination when moisture is consistent. It dries the mulch layer quickly on exposed pads. Without reliable watering, summer applications carry the highest risk of partial or failed establishment.
When is hydroseed coverage established enough for final inspection or erosion control compliance?
Most standard applications reach usable coverage around weeks 4 to 6. This is when inspectors typically look for uniform vegetation. Native mixes take 2 to 3 months, so confirm the standard your permit references before scheduling the walkthrough.
Set Your Seeding Date With the Timeline in Hand
Germination timing is not luck. Match the seed to the season, protect moisture through the first two weeks, and back-plan from your inspection date. The 7-to 14-day and 4-to 6-week benchmarks hold on most Texas sites.
Where conditions get difficult, clay subgrade, steep cut slopes, or a permit deadline that will not move, the right combination of hydraulic mulch, Flexterra, and erosion control keeps the schedule intact. Allied Hydromulch TX, LLC has been applying hydroseeding and erosion control solutions across Texas and the Gulf South since 1990. This includes roughly 15 million square feet of mulch installed in 2025.
Have a site ready or a date to hit? Run numbers through the hydroseeding project cost calculator. Or request a project estimate and call 281-482-8212 to talk through your schedule with our crew.